What you need is:
150 gm. Bitter Dark chocolate- roughly chopped
50 gm. Roasted almonds/cashews
½ tbsp. Orange essence
A Plastic spatula for tempering*
Butter paper
Some ice
Chocolate paper for wrapping
To begin, place the chocolate chunks in clean dry vessel, preferably a bowl and place this vessel in a pan with water (filled about 1/3rd with water). Do not cover the vessel. Heat this on a low flame. This is the double boiling technique used for melting of the chocolate. When about 1/3rd of the chocolate has melted and looks soggy shut the gas and remove the bowl from the water. Add the essence to it. Now the chocolate has to be cooled to room temperature. By room temperature we mean the temperature at which the chocolate would neither be cool nor hot. This is known as tempering* of the chocolate. For this, place the bowl on a vessel filled with some ice and stir it from left to right and right to left using a flat spatula. (Ordinarily, to make chocolates by filling them into moulds you do not need to place the vessel on ice. This is done only for making rocks.) Tempering is not only the ideal way to cool chocolates but it also makes the chocolate richer. You could dip your finger to check and see if it has cooled to be sure. When you feel that the chocolate has cooled to room temperature add the nuts to it. As soon as you realise that the chocolate is cooling down using your fingers place dollops of chocolate along with 1 or 2 nuts in each dollop on butter paper twirling your hand slightly so as to give it a nice shape. Go on doing this real fast and your rocks will be ready. Remember that each piece has to be bite sized and not too large to fit into your mouth.
This has to be done very soon or else the chocolate will cool down and harden and will have to be reheated. The art of making these beautiful rocks neatly will be mastered with practice. Therefore in the beginning one can try making only a few rocks using very little chocolate. Place this tray of rocks in the refrigerator for at least 15-20 minutes. Remove from fridge, separate from paper and wrap them into chocolate paper. Now you are ready with the beautiful, delicious almond rocks you always adored in chocolate shops.
Ms. Arwa Manasawala
Article Source: http://EzineArticles.com/?expert=Arwa_Manasawala

Showing posts with label Chocolate Recipe. Show all posts
Showing posts with label Chocolate Recipe. Show all posts

Three Simple Steps to Making the Perfect Hot Chocolate

Hot chocolate is a drink that is known throughout the world as a drink that is wonderful. It has a rich taste, its warm and makes you feel great. Best of all the drink tastes amazing and will keep you feeling great for a long time after you have finished drinking it. People all over the world are now used to making the drink, but of course with any drink that is popular there are methods to make sure that you make the perfect cup every single time. There is nothing worse than sitting down after you have made what you thought was the perfect cup of hot chocolate only to realise that it tastes disgusting.
That is not something that you want to experience and of course if you do experience it then you may find that you will not try to make another cup again.
But rest assured, that after years of making this seemingly lovely drink have perfected the way that it should be made, and will reveal all today so that you too can join me and make the perfect cup of hot chocolate that both you and your friends can come to enjoy again and again and again.
The first step to making the perfect hot chocolate is to make sure that you have purchased the perfect and most tasteful hot chocolate available to you. I would recommend that you pick a brand that is known for producing high quality products. This may be a little more expensive but you need to understand that the quality of the chocolate must be outstanding if you want to be able to make best cup of hot chocolate. So go for the best brand, you will not regret it.
Next step is to make sure that you use four teaspoons of hot chocolate for each cup that you make. You want to make one cup at a time, and give each cup that you make your full attention. There is nothing worse than trying to make three cups at the same time, and all the three cups are of crap quality. So just focus on the one cup, and use four teaspoons of your high quality chocolate.
The third steps is to make sure that you boil milk and pour it over the hot chocolate nice and slowly. You really want the chocolate granules to melt and dissolve into the milk with ease. Do not rush this step. Once you have filled the cup to the top with milk let it stand for about 30 seconds and then mix with a teaspoon. Then voila you have your perfect cup of hot chocolate. Enjoy.
Leroy has been writing articles for nearly 3 years. Come visit his latest website over at Cosco Car Seats which helps people find the best Cosco Car Seat.
Article Source: http://EzineArticles.com/?expert=Leroy_Nicholson
Chocolate Covered Strawberries - A Delicious Combination!

The dipping of lush red strawberries into chocolate for the making of different types of desserts has been a common practice for many years. As a matter of fact, no one can quite recall when this tempting dish was first created. However, the idea of mixing sweet and tart has led to this dish becoming a particular favorite of many people!
Since fruits are our top vitamin providers, dipping different fruits into chocolate has become a favorite method of creating a healthy, scrumptious dessert! The different types of fruits that can be covered with chocolate are: apples, apricots, cherries, strawberries, peaches, grapes, and a variety of other tropical fruits. In today's world, strange and exotic tasting chocolates are favored more than the normal chocolate bars. In fact, different chocolates are being tried out and released into the market every year, with claims of exotic tastes to tempt the jaded palate! Bearing this in mind, the makers of chocolate covered strawberries create new recipes, with a special flair used to bring out the tart sweetness of the berry, mixed with the melting scrumptiousness of the chocolate covering!
In some countries, chocolate covered strawberries are created using dried strawberries. Although these do taste wonderful, there is nothing quite like the taste of freshness! If you're ever on a tour to Malaysia, make sure you visit their chocolate industry. While the actual chocolate is rather standard, the fruits that are dipped in it are so varied, it boggles the mind! However, you ought to be prepared for dry, tart and spicy!
So where was this art of making chocolate dipped strawberries first born? Although it isn't exactly known, there are some wild theories that this practice first began with the Sultans in the Arab World. However, considering the fact that strawberries seem to be found mostly in wet climes, this theory doesn't seem to be valid!
Chocolate covered strawberries are a treat in any season and more so when they're out of season! When creating this wonderful dish, make sure that you've got the freshest strawberries in the market! Perfectly ripened ones have a taste that's out of this world, but ensure that there are no stragglers with green on them, or you might just be serving more tartness than sweetness!
What you need to create this wonderful dessert:
30-40 fresh, ripe strawberries (with the green stalks cut off)
250 g of Chocolate chips or your favorite chocolate bar whether dark or milk chocolate
Approx. 40 thin skewers of bamboo
How to make chocolate dipped strawberries:
* First of all, wash the strawberries with warm water, to remove any dirt and germs. Let them dry out gently, but completely, or the chocolate won't take.
* Place the chocolate chips or favorite chocolate bars in a small pan. Take a larger pan, and add some water, and then put it to boil.
* Cover the smaller pan containing the chocolate to prevent any moisture from mixing with the chocolate, since this may cause it to seize. Place the smaller pan atop the larger one, but not so that the water from the larger one overlaps the smaller pan.
* Alternatively, just place the chocolate chips or chocolate bars in a glass bowl, cover and use the microwave to melt it. A minute should be enough!
* After the chocolate has melted, place each strawberry onto a skewer, and then dip into the melted chocolate. While removing the strawberry, rotate the skewer to form swirling patterns as well as to cover any nooks left with chocolate.
* Turn the strawberry upwards by inverting your hand to let the chocolate settle with an extra bite at the tip!
* Place the dipped strawberries on absorbent paper after the chocolate has hardened slightly.
* And you're done!
For the ultimate chocolate sensation, chocolate dipped strawberries should be eaten the same day that they're dipped, for the ultimate decadent delight! Storing these in the fridge is done, but not advised since the chocolate may firm up in a haphazard manner.
Chocolate covered strawberries can be served as an elaborate dessert, normally set within a silvered tray, and eaten with a chilled glass of red! However, having chocolate dipped chocolates for high teas or during breakfast is also a wonderful idea (even if it isn't mother recommended)!
Article Source: http://EzineArticles.com/?expert=Colleen_Maguire
How to make chocolate ?

It's easy to make chocolate but it's hard to make chocolate well. This is why there are so few excellent chocolate makers in the world and those who are very good at it retain their respective titles.
You can try making chocolate at home, but after a few attempts, unless you're a hobbyist, you'll probably resort to buying it from the store in the future.
The first thing you'll need to do is select your beans. The Forasteros bean has a slightly bitter taste and weak aroma but due to the fact that it grows in high yields, it's the most popular cocoa bean in the world, accounting for most of the world's chocolate production. The Criollo bean is of higher quality than the Forasteros but more expensive. The Trinitario is a hybrid of the Criollo and the Forasteros, while the Nacional has a nice aroma but it's hard to grow, making it one of the less popular cocoa beans.
After selecting your cocoa beans you'll need to roast them until the hulls crack. It can be anywhere from 10 minutes to a half hour at a temperature range of 250 to 300 degrees. It's important to keep an eye on them so you know when the shells crack and you can take them out before they burn. Use the same method you might use to roast chestnuts and Christmas time.
Remove the husks. It's possible to do this with a hammer and a thick cutting board. Next you'll need to grind the beans to a powder and refine the powder by grinding them again. Since cocoa beans have a pulp and a moisture to them, don't grind them using a wheat grinder, as it will cause the wheat grinder to clog and create a paste rather than a powder.
Next, agitate the chocolate by folding it over and add sugar, lecithin, and milk if you want milk chocolate. This process takes quite a long time and you might need to use a machine that mixes automatically. Some bread mixers work quite well for this.
Finally, temper the chocolate by heating the mixture. This makes the chocolate smooth and shiny, though it's difficult to do it perfectly and if it doesn't temper properly your chocolate could either turn out burned or it might succumb to "bloom," which is when a white covering develops on the outside of the chocolate. Bloom doesn't ruin the chocolate but it does make it less attractive.
After all your hard work, enjoy your final product. Remember, after all, that chocolate contains alkaloids that are similar to the hormones your body produces when you're falling in love.
keyword:
history of chocolate
types of chocolate
chocolate information
making chocolate
chocolate movie
chocolate rain
chocolate recipes
chocolate pictures
hershey Chocolate
Chocolate Gifts
godiva Chocolate
History Of Chocolate
Dark Chocolate
Chocolate Pictures
chocolate Movie
Chocolate Candy
Tuxedo Brownies Recipe

21-oz brownie mix
½ cup seedless raspberry jam
2 cups fresh raspberries
3 -oz each white chocolate, melted and cooled slightly
16-oz each cream cheese, softened
½ cup powdered sugar
¼ cup milk
8-oz frozen whipped topping, thawed
Melt chocolate / Chocolate curls, optional
Preheat oven to 350 degrees. Lightly spray the bottom of a 9 x 13-inch pan with nonstick cooking spray. Set aside.
Prepare and bake brownie mix according to the package directions. Cool completely. Spread jam onto the brownie. Reserve ½ cup of the raspberries for garnish. Arrange the remaining 1 ½ cups raspberries evenly over the jam. Microwave chocolate on high for 1 minute; stir. Microwave another 30 seconds or until chocolate is completely melted when stirred; cool slightly. Meanwhile, combine cream cheese and powdered sugar in a mixing bowl; mix well. Gradually whisk in the melted chocolate and the milk. Fold in the whipped topping; spread carefully over the raspberries. Refrigerate for an hour or until firm. Cut into 15 squares. Garnish with the reserved raspberries and melt chocolate / chocolate curls, if desired. Store covered in the refrigerator (if you have any leftovers!)
Enjoy!
Tips for Successfully Melting Chocolate

Chocolate must be melted smoothly to prevent it from scorching or burning. The traditional method for melting chocolate is with a double boiler, which works well, but can be a bit risky since you are increasing the chance that the chocolate seizes as a result of coming in contact with water.
You can either melting the chocolate directly on top of the stove or in the microwave.
Here are some important tips for safely melting chocolate:
* Chop the chocolate into small uniform pieces so it melts faster and more evenly and is less likely to burn
* Never try to melt large bars or blocks of chocolate that have not been chopped since they are much more likely to burn before they melt.
* Avoid any contact with water or moisture. When moisture causes chocolate to get thick, grainy and lumpy it is called seizing. Make sure your bowls, utensils, and pans are completely dry and that no moisture gets into the chocolate when melting.
* Stir the chocolate frequently with a rubber spatula, once the outer edges start to melt to prevent it from scorching.
* Chocolate retains its shape when melted in the microwave, so the only way to know if it is truly melted is to stir it.
- How to Melt Chocolate in the Microwave
Melting chocolate in the microwave is fast and easy. When done properly, chocolate can be melted in the microwave more quickly than directly on the stove top or in a double boiler, and with less effort and mess. The time required will depend on the amount and type of chocolate being melted.
Start by placing the small pieces of chopped chocolate in a microwave safe bowl and heating for 30 to 45 seconds on 100% power. Then stir the chocolate well. If needed, microwave for additional 10 to 20 second intervals, stirring well after each interval, until the chocolate is melted and smooth.
- Melting Chocolate on the Top of the Stove
Most cookbooks and cooking experts will tell you to never melt chocolate directly on the stove top. But if you don't have access to a microwave, be very careful and don't walk away from the stove with chocolate on a burner.
Place the small pieces of chopped chocolate in a small, heavy-bottomed saucepan over the lowest heat possible. Stir the chocolate constantly and remove it from the heat just before it is completely melted. Continue to stir until the chocolate is melted and smooth. Just remember low and slow and you should have no problem.
What to Do If the Chocolate Seizes?
Stir 1 tablespoon of vegetable oil or shortening into every 6 ounces of chocolate and stir until smooth.
Foolproof Chocolate Fudge - Simplify Your Gift Giving

One of the easiest ways to let someone know you've been thinking of him or her is to bring a gift of food. I, for one, always love to get something that will satisfy my sweet tooth. Foolproof Chocolate Fudge is the perfect gift.
Foolproof means exactly what it says. And this fudge is so easy to whip up. Only you will know just how easy it was. I'd like to share this great recipe with you now.
Ingredients:
3 (6 oz) Packages Semi-sweet chocolate chips
1 (14oz) Can Sweetened Condensed Milk
3/4 Cup Chopped nuts
1 1/2 teaspoonful Vanilla Extract
Directions:
In a heavy saucepan melt chocolate chips and milk over low heat to prevent scorching. When thoroughly blended and melted, remove from heat. Stir in vanilla and nuts.
Spread evenly into a 9" square pan lined with wax paper. Chill 2 hours or until set. Turn out on cutting board, peel off wax paper and slice into desired shape and sizes.
Store loosely covered at room temperature. That is, if there's any left. This fudge has a tendency to "disappear" quickly.
Fall is upon us. Thanksgiving and Christmas truly are just around the corner. In order to make someone's day special and not break the bank in the process, shop around at the dollar stores and such for beautifully decorated holiday tins. They would make the perfect packaging for your handmade food gift. The tins are reusable and keep the fudge fresh and delicious.
Simplify your gift giving by mixing up a couple of batches to have on hand. You never know when you'll need an impromptu gift. Attach a hand-written note with a pretty ribbon and you're all set. Giving a homemade gift really does set you apart from all the others.
Sticky Chocolate Bars

A messy chocolate bar is the best way to suit your summer cravings. Summer snacks are believed to be comforting, but at the same time refreshing. Exactly this is what you are going to have if you follow correctly the next few steps.
All you need are five all time favorite ingredients and some basic kitchen equipments. A bag of milk chocolate chips or you may use semi-sweet ones. Walnuts and unsalted butter will lower the sweetness. Twenty five to thirty Graham Crackers, but for a healthy touch you may use whole-wheat butter crackers. Last but not least, two cans of condensed milk.
Sticky is very yummy, but it has to stick to the right things. That is why we need butter, so just take a plate and melt the butter for one minute and thirty seconds in the microwave. Then, take the crackers and crumble them. My own technique is doing it inside a zip-lock bag. Remember we want big chunks, not a thin dust.
Many desserts are made of layers including this chocolate bar. First, the crumbled crackers and on top, the butter acting as a non-sticking agent. Adding the walnuts will give it a great body to work with. Lastly, spread the condensed milk and the chocolate chips in the baking pan evenly.
Preheat the oven to 375 °F for 15 minutes. Then lower the temperature to 350°F and then put the bars inside. It will be tempting, but still after half an hour of baking you should wait for it to cool for at least an hour before cutting. Then wait for a minute, and enjoy.
This mouth-watering treat will show you a bit of Heaven. So now, enjoy and share...or not.
A Healthy 5 Minutes Chocolate Fudge Recipe

This healthy 5 minutes chocolate fudge recipe has been created by a Certified Nutrition Specialist, Brendan Harris, who try the best effort to make tasty foods that you probably would not think were actually good for you. The problem with a lot of desserts that are deemed to be "healthy" is that they simply improve the flavor by taking away fat and adding sugar or using artificial sweeteners. In fact, nothing healthy about that!
Here is a chocolate- peanut- butter fudge recipe that is very simple and easy to make. It fact, it will take just 5 minutes to bake! Plus, it contains no sugar or artificial sweeteners. Instead, it relies on healthy fat sources. If you don't like peanut butter, you can just leave it out and use chocolate.
Ingredients:
3-4 oz extra dark chocolate bar - try for one with at least 70% cocoa content
5 tbsp of any organic nut butter
¾ cup of organic coconut milk
2 tbsp oat bran
½ cup raw pecans, almonds, or walnuts
½ cup dried cranberries or raisins (optional)
1 tsp vanilla extract
a little stevia to lightly sweeten (stevia is a natural sweetener that has no calories)
Instructions:
Combine the coconut milk, nut butter, and chocolate bar in a saucepan over the lowest heat possible. Stir all the contents together, and then add other ingredients in.
Next, spread your mixture onto some waxed paper in a baking dish and place it in the refrigerator. You now have fudge that is much more nutritional than any other type you will get!
Enjoy!
Chocolate Caramel Popcorn
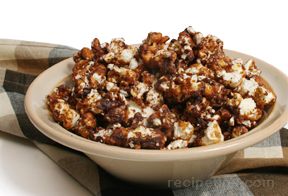
How about a sweet treat for the kids? Caramel chocolate popcorn is a great treat for slumber parties, camp outs or just family movie night fun. So give this a try. Your kids will love it and you will too.
Ingredients needed
1 cup of popcorn for popping
1 pound of bitter sweet chocolate melted, may use a bag of chocolate morsels melted
For the caramel:
1 cup plus 2 tablespoons of sugar
½ cup plus 2 tablespoons of corn syrup
Scant ¼ cup of water
Pop the popcorn. You may use a hot air popper if you like or any way you prefer.
To make the caramel:
Place the corn syrup, sugar, and water in a heavy bottom 2 quart sauce pan over medium high heat and cook until light golden brown. Use a nice large pan so you have room to add the popcorn.
Use a wooden spoon to stir the popcorn into the caramel until it is evenly coated. Pour the caramelized popcorn onto a parchment paper lined baking sheet and allow it to cool. If you don't have parchment paper, just lightly oil your baking sheet. When cool, use your hands to break up any clumps.
Place the cool popcorn in a large bowl. Use a ladle to drizzle the chocolate over the popcorn, stirring with your wooden spoon as you go. Keep adding chocolate until the popcorn is evenly coated. Pour the chocolate coated popcorn onto a fresh parchment paper lined baking sheet until its cool.
This recipe makes 4 cups of popcorn.
Tips:
When cool, place in decorative bags to give as gifts.
Use milk chocolate and or white chocolate to coat the popcorn.
Be careful when working with caramel, it gets very hot and can burn.
Keep a bowl of ice and water beside you in case you get caramel on your skin.
Chocolate Pie Recipe for Diabetes

CHOCOLATE PIE
1 cup Equal Sugar-Lite 1/2 cup baking cocoa
5 tbsp cornstarch
3 cups milk
3 egg yolks, beaten
1 tsp vanilla extract
1 tsp butter
1 baked 9-inch pie shell
Whipped cream for garnish, if desired
Mix together Equal, cocoa and cornstarch. Set aside. Pour milk into a medium-sized heavy saucepan and heat until warm. Remove 1/2 cup milk and add the yolks; beat until smooth. Add mixture back into milk and stir constantly. Stir in cocoa mixture and continue stirring. Cook, stirring frequently, until thickened. Remove from heat and add vanilla and margarine. Stir until mixed well. Pour into pie shell. Before serving, top with whipped cream.
Raw Chocolate Bars Recipe

To make this recipe you need a grinder or a mortar and pestle
Ingredients for simple chocolate:
1/2 C whole peeled cacao beans, ground
1/8 C coconut oil
1/8 C melted cacao butter (use coconut oil if not available)
1/4 C raw honey or raw agave syrup
Optional ingredients:
1/4 cup raisins
1 T almonds, finely chopped
1 drop orange, lemon, clove, lavender or other essential oil
Cinnamon to taste
Celtic sea salt to taste
Preparation:
Grind cacao until it is very fine. The cacao will have a consistency like raw almond butter and will stick to the sides of the grinder. Mix ground cacao with coconut oil or cacao butter in grinder. Remove mixture and add honey and other ingredients. Stir well with a fork. The mixture should be able to be poured. If not, add more coconut oil. Pour into ice cube trays or other forms and freeze for 45 minutes. Serve immediately after removing from the freezer.
Chocolate Crepes Recipe

Ingredients:
2 cups milk
1 1/2 cups flour
1/2 cup cocoa powder
6 tablespoons powdered sugar
2 large eggs
2 tablespoons butter, melted
1/2 teaspoon pure vanilla extract
1/4 teaspoon salt
Chocolate Sauce:
1 ¼ cup sugar
2/3 cup cocoa
1 cup plus 4 tablespoons evaporated milk
1/2 cup butter
1/4 teaspoon salt
Preparation:
Whisk all the ingredients vigorously until the crepe batter is completely smooth; allow it to rest in the refrigerator for at least 20 minutes before making into crepes.
Melt a little butter in a crepe pan or large skillet over low-medium heat. Add 3 tablespoons of batter to the pan and swirl until the bottom of the pan is covered with batter. Cook the crepe for 1 minute, or until the crepe is slightly moist on top and golden underneath. Loosen the edges of the crepe, slide the spatula under it, and then gently flip it upside down into the pan. Cook for 1 minute and transfer the cooked crepe to a plate to keep warm. Repeat with the remaining batter.
Chocolate Sauce:
Stir together sugar and cocoa in small saucepan; gradually stir in evaporated milk. Add butter and salt. Cook over medium heat, stirring constantly, until mixture boils. Remove from heat.
Makes 12 servings.
Basic Chocolate Truffles Recipe


Ingredients:
2/3 cup heavy cream
12 ounces semisweet chocolate, chopped into very small pieces
1 teaspoon vanilla extract
1/3 cup premium cocoa
Preparation:
In a small saucepan over medium heat, bring the heavy cream just to a boil. Remove from the heat immediately. Add the chopped chocolate and vanilla extract and stir until the mixture – ganache - is completely smooth.
Chill the ganache until it is hard enough to roll into balls. Measuring out a heaping teaspoon, quickly roll the ganache into a ball. Roll the ball in the cocoa powder and chill.
Blue Belle Terrace's Perfect Chocolate Cake - A Recipe
If one has ever been a regular Disneyland visitor they will know the true treat and pleasure of discovering that one trip when The River Belle Terrace is open. That beautiful little Frontierland restaurant that overlooks The Rivers of America is a child's dream. With that delicious taste of light and rich chocolate cake, I knew peace and heaven all put into one.
It's like all the perfect views put into one. The twinkling blue waters of The Rivers of America radiate the sun and shine if for the whole park to see. Thunder Mountain rises from the ground to challenge all those who wish to dare the mines. The Golden Horseshoe Saloon beckons all those who wish to join in fun and laughter.
I can smell the water drifting over the sidewalk. It's a smell that I will always associate with that place in time. Along with that came the smell of melted butter form the popcorn carts below, fried chicken wafts up from the fast service cart by the saloon, and the smell of Mexican food lingers from the base of the mountain.
The whistle of the steam boats calls us back to a past that we never knew. It's a past where men road horses and packed weapons, and where ladies carried handkerchiefs and wore long dresses. Then the sound of laughter brings me to the present, where families are happy together and the screams are only those of thrills and not of fears.
I have the heart of an observer here. While there is the feeling of excitement and adventure in the air, I observe and feel peace. As a child I even know that this is what true happiness must be: peace within the heart of my excitement.
True bliss didn't come completely until I bit into that cake. A perfect blend of gourmet and home-style cooking as only Disney could create. It's a simple miracle to a small town child. Sweet and heavenly as my memory, it still calls to me. I have looked through many recipes to find that memory. That is until I found this one. I hope it helps find your special memory too:
"Blue Belle Terrace's Chocolate Cake"*
Ingredients: 1/2 cup plus 6 tbs unsalted butter, 1/2 cup whole-wheat flour, 1/2 cup all-purpose flour, 1/2 cup cocoa powder, 1 tsp baking powder, 1/8 tsp salt, 6 eggs plus 3 separated, 1/2 cup Splenda, 1/2 cup plus 3 tbs sugar, 2 tsps vanilla extract, 8 oz semi-sweet chopped chocolate, and 1 cup of heavy cream.
1) Pre-heat oven to 350 degrees. Line three 8 inch round cake pans with waxed paper and then grease.
2) Dust evenly with flour and spread with a pastry brush.
3) Melt 1/2 cup butter over low heat. With a spoon skim off any foam.
4) Sift the flours, cocoa, baking powder, and salt three times.
5) Place the 6 eggs, 1/2 cup sugar, and Splenda in a large heatproof bowl set over a pan of hot water. With an electric mixer beat for about 10 minutes. Add the vanilla.
6) Sift the dry ingredients over the egg mixture in three batches folding in after each addition. Fold in the melted butter.
7) Divide the batter between pans and bake for about 5 minutes. Transfer to a rack.
8) For the icing melt the chocolate in a heatproof bowl set over hot water.
9) Take off the heat, stir in the 6 tbs of butter and 3 egg yolks. Return to low heat and stir until thick. Remove from the heat. Whip the cream until firm in another bowl. In yet another bowl beat the 3 egg whites until stiff. Add the sugar and beat until glossy.
10) Fold the cream into the chocolate and fold in the egg whites. Refrigerate for 20 minutes.
11) Sandwich the cake layers with icing. Spread the rest of the icing over the tops and sides.
12) Enjoy on a terrace of your very own.
* Base of recipe from Cake and I molded it from there.
Rachael Rizzo has been acting since she was nine years old. She uses her experience to write about what the things she loves mean to her (mostly movies and baking). She is twenty-three years old and resides in beautiful Oregon.
Article Source: http://EzineArticles.com/?expert=Rachael_Rizzo
It's like all the perfect views put into one. The twinkling blue waters of The Rivers of America radiate the sun and shine if for the whole park to see. Thunder Mountain rises from the ground to challenge all those who wish to dare the mines. The Golden Horseshoe Saloon beckons all those who wish to join in fun and laughter.
I can smell the water drifting over the sidewalk. It's a smell that I will always associate with that place in time. Along with that came the smell of melted butter form the popcorn carts below, fried chicken wafts up from the fast service cart by the saloon, and the smell of Mexican food lingers from the base of the mountain.
The whistle of the steam boats calls us back to a past that we never knew. It's a past where men road horses and packed weapons, and where ladies carried handkerchiefs and wore long dresses. Then the sound of laughter brings me to the present, where families are happy together and the screams are only those of thrills and not of fears.
I have the heart of an observer here. While there is the feeling of excitement and adventure in the air, I observe and feel peace. As a child I even know that this is what true happiness must be: peace within the heart of my excitement.
True bliss didn't come completely until I bit into that cake. A perfect blend of gourmet and home-style cooking as only Disney could create. It's a simple miracle to a small town child. Sweet and heavenly as my memory, it still calls to me. I have looked through many recipes to find that memory. That is until I found this one. I hope it helps find your special memory too:
"Blue Belle Terrace's Chocolate Cake"*
Ingredients: 1/2 cup plus 6 tbs unsalted butter, 1/2 cup whole-wheat flour, 1/2 cup all-purpose flour, 1/2 cup cocoa powder, 1 tsp baking powder, 1/8 tsp salt, 6 eggs plus 3 separated, 1/2 cup Splenda, 1/2 cup plus 3 tbs sugar, 2 tsps vanilla extract, 8 oz semi-sweet chopped chocolate, and 1 cup of heavy cream.
1) Pre-heat oven to 350 degrees. Line three 8 inch round cake pans with waxed paper and then grease.
2) Dust evenly with flour and spread with a pastry brush.
3) Melt 1/2 cup butter over low heat. With a spoon skim off any foam.
4) Sift the flours, cocoa, baking powder, and salt three times.
5) Place the 6 eggs, 1/2 cup sugar, and Splenda in a large heatproof bowl set over a pan of hot water. With an electric mixer beat for about 10 minutes. Add the vanilla.
6) Sift the dry ingredients over the egg mixture in three batches folding in after each addition. Fold in the melted butter.
7) Divide the batter between pans and bake for about 5 minutes. Transfer to a rack.
8) For the icing melt the chocolate in a heatproof bowl set over hot water.
9) Take off the heat, stir in the 6 tbs of butter and 3 egg yolks. Return to low heat and stir until thick. Remove from the heat. Whip the cream until firm in another bowl. In yet another bowl beat the 3 egg whites until stiff. Add the sugar and beat until glossy.
10) Fold the cream into the chocolate and fold in the egg whites. Refrigerate for 20 minutes.
11) Sandwich the cake layers with icing. Spread the rest of the icing over the tops and sides.
12) Enjoy on a terrace of your very own.
* Base of recipe from Cake and I molded it from there.
Rachael Rizzo has been acting since she was nine years old. She uses her experience to write about what the things she loves mean to her (mostly movies and baking). She is twenty-three years old and resides in beautiful Oregon.
Article Source: http://EzineArticles.com/?expert=Rachael_Rizzo
Mexican Chocolate Brownies
Brownies:
½ cup all purpose flour
1 ½ teaspoons ground cinnamon
½ round disc Mexican chocolate, pulverized
1/8 teaspoon salt
6 ounces semi-sweet chocolate, chopped
¾ cup (1 ½ sticks) unsalted butter, diced, room temperature
4 large eggs
1 cup sugar
1 ½ teaspoons vanilla
1 cup chopped walnuts
Topping:
6 ounces semi-sweet chocolate, chopped
½ round disc Mexican Chocolate, pulverized
3 tablespoons unsalted butter, room temperature
2 tablespoons whipping cream
For brownies: Position rack in center of oven and preheat to 350°. Generously butter an 8x8x2 inch metal baking pan; dust with flour. Mix first three ingredients in small bowl. Stir chocolates and butter in top of double boiler set over simmering water until melted. Stir until smooth. Turn off heat. Let chocolate stand over water.
Using electric mixer, beat eggs and sugar in large bowl until mixture thickens and falls in soft ribbon when beaters are lifted, about 5 minutes. Beat in vanilla. Stir in flour mixture in 2 additions, blending well after each. Gradually add warm chocolate to egg mixture, beating until just combined. Stir in walnuts.
Pour batter into prepared pan. Bake brownies until top is set and tester inserted into center comes out with moist crumbs attached, about 35 minutes. Cool completely in pan on rack.
For topping: Whisk all ingredients in small saucepan over medium-low heat until melted and smooth. Pour evenly over brownies in pan.
Chill brownies until topping is set, about 2 hours. Cut into 16 squares.
½ cup all purpose flour
1 ½ teaspoons ground cinnamon
½ round disc Mexican chocolate, pulverized
1/8 teaspoon salt
6 ounces semi-sweet chocolate, chopped
¾ cup (1 ½ sticks) unsalted butter, diced, room temperature
4 large eggs
1 cup sugar
1 ½ teaspoons vanilla
1 cup chopped walnuts
Topping:
6 ounces semi-sweet chocolate, chopped
½ round disc Mexican Chocolate, pulverized
3 tablespoons unsalted butter, room temperature
2 tablespoons whipping cream
For brownies: Position rack in center of oven and preheat to 350°. Generously butter an 8x8x2 inch metal baking pan; dust with flour. Mix first three ingredients in small bowl. Stir chocolates and butter in top of double boiler set over simmering water until melted. Stir until smooth. Turn off heat. Let chocolate stand over water.
Using electric mixer, beat eggs and sugar in large bowl until mixture thickens and falls in soft ribbon when beaters are lifted, about 5 minutes. Beat in vanilla. Stir in flour mixture in 2 additions, blending well after each. Gradually add warm chocolate to egg mixture, beating until just combined. Stir in walnuts.
Pour batter into prepared pan. Bake brownies until top is set and tester inserted into center comes out with moist crumbs attached, about 35 minutes. Cool completely in pan on rack.
For topping: Whisk all ingredients in small saucepan over medium-low heat until melted and smooth. Pour evenly over brownies in pan.
Chill brownies until topping is set, about 2 hours. Cut into 16 squares.
Why Cook Gourmet Chocolate Centers in Copper Pots?
One of the distinct and tasty advantages to working in a chocolate factory is the opportunity to give tours to great people who love great gourmet chocolates. I wasn't raised making chocolate confections, so almost everything I've learned is new to me. I came on board at Lula's Chocolates as the business end of things but have found that I have a great interest in the production process.
I have had to learned the basics in order to conduct tours when nobody else was available but have taken it upon myself to learn the details of chocolate making. One of the questions I always get asked is why we cook our lush centers in huge, copper pots. This is one of those savory details I have loved investigating.
In my search for the answer, I first went to the source-the master chocolatier, Scott Lund. He explained that copper pots transfer the heat better so that the centers cook more evenly and the chances of their burning is reduced. That was a perfectly accurate answer, and one that would probably suffice for the average person coming through the factory for a tour, but the answer only fueled my curiosity. I wanted to know more.
These days it's easy to find out anything if you're willing to Google a topic and do some reading, so that is exactly what I did. I am now convinced that cooking in copper is the only way to go. Two of the most informative and easy-to-read articles are "Cooking with Copper" at rameria.com and "Understanding Pan Structure" at cookswares.com. Naturally these two websites are interested in selling copper pots, and they would like everybody to cook in copper so that their copper pots will sell. Yet sometimes the goal of selling becomes a great motivation for producing useful and even fascinating information.
So that you don't have to read all of the information given on these two sites, I will give you the lowdown on copper pot cooking in laymen's terms. Other than silver, copper is the best metal you can use if you want to conduct heat. For example, you can use a lower heat than you would with a stainless steel pot, and you can get a more consistent result. In addition, the copper disperses the heat better across the entire pot instead of just concentrating it where the heat is applied to the pot. This gives you more control over the cooking process. Finally, when you remove the pot from the heat, the heat disperses faster, allowing you to exercise more control over how long your items cook in the pot.
According to some websites, one of the down sides of using copper is what happens when you cook acidic foods. Acidic foods can actually leech some of the copper out of the pot, which is obviously poisonous. Fortunately for Lula's, the only tastiness being cooked are the candy centers of it's gourmet chocolate-which means perfectly created cremes, caramels, and ganaches. Every single time.
Come and explore the final results of cooking gourmet chocolates in copper pots at http://www.lulas.com
Article Source: http://EzineArticles.com/?expert=Aaron_Davidson
I have had to learned the basics in order to conduct tours when nobody else was available but have taken it upon myself to learn the details of chocolate making. One of the questions I always get asked is why we cook our lush centers in huge, copper pots. This is one of those savory details I have loved investigating.
In my search for the answer, I first went to the source-the master chocolatier, Scott Lund. He explained that copper pots transfer the heat better so that the centers cook more evenly and the chances of their burning is reduced. That was a perfectly accurate answer, and one that would probably suffice for the average person coming through the factory for a tour, but the answer only fueled my curiosity. I wanted to know more.
These days it's easy to find out anything if you're willing to Google a topic and do some reading, so that is exactly what I did. I am now convinced that cooking in copper is the only way to go. Two of the most informative and easy-to-read articles are "Cooking with Copper" at rameria.com and "Understanding Pan Structure" at cookswares.com. Naturally these two websites are interested in selling copper pots, and they would like everybody to cook in copper so that their copper pots will sell. Yet sometimes the goal of selling becomes a great motivation for producing useful and even fascinating information.
So that you don't have to read all of the information given on these two sites, I will give you the lowdown on copper pot cooking in laymen's terms. Other than silver, copper is the best metal you can use if you want to conduct heat. For example, you can use a lower heat than you would with a stainless steel pot, and you can get a more consistent result. In addition, the copper disperses the heat better across the entire pot instead of just concentrating it where the heat is applied to the pot. This gives you more control over the cooking process. Finally, when you remove the pot from the heat, the heat disperses faster, allowing you to exercise more control over how long your items cook in the pot.
According to some websites, one of the down sides of using copper is what happens when you cook acidic foods. Acidic foods can actually leech some of the copper out of the pot, which is obviously poisonous. Fortunately for Lula's, the only tastiness being cooked are the candy centers of it's gourmet chocolate-which means perfectly created cremes, caramels, and ganaches. Every single time.
Come and explore the final results of cooking gourmet chocolates in copper pots at http://www.lulas.com
Article Source: http://EzineArticles.com/?expert=Aaron_Davidson
Chocolate Covered Strawberries - A Delicious Combination!
The dipping of lush red strawberries into chocolate for the making of different types of desserts has been a common practice for many years. As a matter of fact, no one can quite recall when this tempting dish was first created. However, the idea of mixing sweet and tart has led to this dish becoming a particular favorite of many people!
Since fruits are our top vitamin providers, dipping different fruits into chocolate has become a favorite method of creating a healthy, scrumptious dessert! The different types of fruits that can be covered with chocolate are: apples, apricots, cherries, strawberries, peaches, grapes, and a variety of other tropical fruits. In today's world, strange and exotic tasting chocolates are favored more than the normal chocolate bars. In fact, different chocolates are being tried out and released into the market every year, with claims of exotic tastes to tempt the jaded palate! Bearing this in mind, the makers of chocolate covered strawberries create new recipes, with a special flair used to bring out the tart sweetness of the berry, mixed with the melting scrumptiousness of the chocolate covering!
In some countries, chocolate covered strawberries are created using dried strawberries. Although these do taste wonderful, there is nothing quite like the taste of freshness! If you're ever on a tour to Malaysia, make sure you visit their chocolate industry. While the actual chocolate is rather standard, the fruits that are dipped in it are so varied, it boggles the mind! However, you ought to be prepared for dry, tart and spicy!
So where was this art of making chocolate dipped strawberries first born? Although it isn't exactly known, there are some wild theories that this practice first began with the Sultans in the Arab World. However, considering the fact that strawberries seem to be found mostly in wet climes, this theory doesn't seem to be valid!
Chocolate covered strawberries are a treat in any season and more so when they're out of season! When creating this wonderful dish, make sure that you've got the freshest strawberries in the market! Perfectly ripened ones have a taste that's out of this world, but ensure that there are no stragglers with green on them, or you might just be serving more tartness than sweetness!
What you need to create this wonderful dessert:
30-40 fresh, ripe strawberries (with the green stalks cut off)
250 g of Chocolate chips or your favorite chocolate bar whether dark or milk chocolate
Approx. 40 thin skewers of bamboo
How to make chocolate dipped strawberries:
First of all, wash the strawberries with warm water, to remove any dirt and germs. Let them dry out gently, but completely, or the chocolate won't take.
Place the chocolate chips or favorite chocolate bars in a small pan. Take a larger pan, and add some water, and then put it to boil.
Cover the smaller pan containing the chocolate to prevent any moisture from mixing with the chocolate, since this may cause it to seize. Place the smaller pan atop the larger one, but not so that the water from the larger one overlaps the smaller pan.
Alternatively, just place the chocolate chips or chocolate bars in a glass bowl, cover and use the microwave to melt it. A minute should be enough!
After the chocolate has melted, place each strawberry onto a skewer, and then dip into the melted chocolate. While removing the strawberry, rotate the skewer to form swirling patterns as well as to cover any nooks left with chocolate.
Turn the strawberry upwards by inverting your hand to let the chocolate settle with an extra bite at the tip!
Place the dipped strawberries on absorbent paper after the chocolate has hardened slightly.
And you're done!
For the ultimate chocolate sensation, chocolate dipped strawberries should be eaten the same day that they're dipped, for the ultimate decadent delight! Storing these in the fridge is done, but not advised since the chocolate may firm up in a haphazard manner.
Chocolate covered strawberries can be served as an elaborate dessert, normally set within a silvered tray, and eaten with a chilled glass of red! However, having chocolate dipped chocolates for high teas or during breakfast is also a wonderful idea (even if it isn't mother recommended)!
Ordering chocolate dipped strawberries is best done online, or from a delicatessen closest to you!
Colleen Maguire
Writer, Traveler and Chocolate Lover
For More Delicious Chocolate Ideas and Tastes:
http://www.UltimateChocolateShoppe.com
Article Source: http://EzineArticles.com/?expert=Colleen_Maguire
Since fruits are our top vitamin providers, dipping different fruits into chocolate has become a favorite method of creating a healthy, scrumptious dessert! The different types of fruits that can be covered with chocolate are: apples, apricots, cherries, strawberries, peaches, grapes, and a variety of other tropical fruits. In today's world, strange and exotic tasting chocolates are favored more than the normal chocolate bars. In fact, different chocolates are being tried out and released into the market every year, with claims of exotic tastes to tempt the jaded palate! Bearing this in mind, the makers of chocolate covered strawberries create new recipes, with a special flair used to bring out the tart sweetness of the berry, mixed with the melting scrumptiousness of the chocolate covering!
In some countries, chocolate covered strawberries are created using dried strawberries. Although these do taste wonderful, there is nothing quite like the taste of freshness! If you're ever on a tour to Malaysia, make sure you visit their chocolate industry. While the actual chocolate is rather standard, the fruits that are dipped in it are so varied, it boggles the mind! However, you ought to be prepared for dry, tart and spicy!
So where was this art of making chocolate dipped strawberries first born? Although it isn't exactly known, there are some wild theories that this practice first began with the Sultans in the Arab World. However, considering the fact that strawberries seem to be found mostly in wet climes, this theory doesn't seem to be valid!
Chocolate covered strawberries are a treat in any season and more so when they're out of season! When creating this wonderful dish, make sure that you've got the freshest strawberries in the market! Perfectly ripened ones have a taste that's out of this world, but ensure that there are no stragglers with green on them, or you might just be serving more tartness than sweetness!
What you need to create this wonderful dessert:
30-40 fresh, ripe strawberries (with the green stalks cut off)
250 g of Chocolate chips or your favorite chocolate bar whether dark or milk chocolate
Approx. 40 thin skewers of bamboo
How to make chocolate dipped strawberries:
First of all, wash the strawberries with warm water, to remove any dirt and germs. Let them dry out gently, but completely, or the chocolate won't take.
Place the chocolate chips or favorite chocolate bars in a small pan. Take a larger pan, and add some water, and then put it to boil.
Cover the smaller pan containing the chocolate to prevent any moisture from mixing with the chocolate, since this may cause it to seize. Place the smaller pan atop the larger one, but not so that the water from the larger one overlaps the smaller pan.
Alternatively, just place the chocolate chips or chocolate bars in a glass bowl, cover and use the microwave to melt it. A minute should be enough!
After the chocolate has melted, place each strawberry onto a skewer, and then dip into the melted chocolate. While removing the strawberry, rotate the skewer to form swirling patterns as well as to cover any nooks left with chocolate.
Turn the strawberry upwards by inverting your hand to let the chocolate settle with an extra bite at the tip!
Place the dipped strawberries on absorbent paper after the chocolate has hardened slightly.
And you're done!
For the ultimate chocolate sensation, chocolate dipped strawberries should be eaten the same day that they're dipped, for the ultimate decadent delight! Storing these in the fridge is done, but not advised since the chocolate may firm up in a haphazard manner.
Chocolate covered strawberries can be served as an elaborate dessert, normally set within a silvered tray, and eaten with a chilled glass of red! However, having chocolate dipped chocolates for high teas or during breakfast is also a wonderful idea (even if it isn't mother recommended)!
Ordering chocolate dipped strawberries is best done online, or from a delicatessen closest to you!
Colleen Maguire
Writer, Traveler and Chocolate Lover
For More Delicious Chocolate Ideas and Tastes:
http://www.UltimateChocolateShoppe.com
Article Source: http://EzineArticles.com/?expert=Colleen_Maguire
Mickael Teaches You How to Make Truffles - Truffles Chocolate Chennai
If chocolates make you go weak in the knees then here is one person you should thank for the varieties he makes and sells. Mickael Besse, the in-house bakery at Sathyam Cinemas. He has previously worked with The Inter-Continental, a five star hotel at Beirut, Lebanon, as Pastry Chef. He has previously worked at Michelin, Vienne, Saint-Bonnet-le-Froid and Belgium. Here is a great recipe of truffles from him to try at home.
Ingredients
205 grams whipped cream
15 grams invert sugar (a mixture of glucose and fructose)
20 grams hazelnut praliné (60% hazelnut / 40% sugar)
500 grams dark chocolate
50 grams soft unsalted butter
Procedure
Boil the cream with invert sugar. Slowly pour the hot liquid over the ground chocolate, stirring with the spatula, from the center out, gradually incorporating the liquid. That way, you obtain a core with an elastic and shiny texture, which must be maintained until the entire liquid is incorporated. When the temperature of the ganache reaches 35-40ºC, add the diced hazelnut praline and the butter, then pipe the mix with pastry bag in shapes of balls. Allow the ganache to crystallize, coat the ball with melted dark chocolate at 35ºC then immediately coat it in black cocoa powder.
Mickael believes that a good chocolate is made of 100% cocoa beans and not adulterated by vegetable fats. He also suggests that you should avoid over roasting the cocoa beans during the process of making the chocolate. "My personal favorite is the 70% plain dark chocolate, with crushed roasted cocoa beans, covered with a thin layer of dark chocolate (56% cocoa), from Valrhona, France," he adds.
Truffles Chocolate Chennai has been written by Kamakshi Alagapan who writes for MetroMela
Article Source: http://EzineArticles.com/?expert=Kamakshi_Alagapan
Ingredients
205 grams whipped cream
15 grams invert sugar (a mixture of glucose and fructose)
20 grams hazelnut praliné (60% hazelnut / 40% sugar)
500 grams dark chocolate
50 grams soft unsalted butter
Procedure
Boil the cream with invert sugar. Slowly pour the hot liquid over the ground chocolate, stirring with the spatula, from the center out, gradually incorporating the liquid. That way, you obtain a core with an elastic and shiny texture, which must be maintained until the entire liquid is incorporated. When the temperature of the ganache reaches 35-40ºC, add the diced hazelnut praline and the butter, then pipe the mix with pastry bag in shapes of balls. Allow the ganache to crystallize, coat the ball with melted dark chocolate at 35ºC then immediately coat it in black cocoa powder.
Mickael believes that a good chocolate is made of 100% cocoa beans and not adulterated by vegetable fats. He also suggests that you should avoid over roasting the cocoa beans during the process of making the chocolate. "My personal favorite is the 70% plain dark chocolate, with crushed roasted cocoa beans, covered with a thin layer of dark chocolate (56% cocoa), from Valrhona, France," he adds.
Truffles Chocolate Chennai has been written by Kamakshi Alagapan who writes for MetroMela
Article Source: http://EzineArticles.com/?expert=Kamakshi_Alagapan
Food & Drink Paradise - Chocolate Candy Stocks
Week-end is coming, what about creating your own brand of candy?
Are you interested to know how to make chocolate candy?
Keeping some delicious candy stocks at home?
You are now standing in front of a famous chocolate candy shop in town.
Wondering what should you be getting for your coming birthday party?
Madam, are you looking for a new candy? What about trying a
new chocolate candy?
Chocolate Caramels
Ingredients A
750g sugar
250g butter
250 ml milk
1 tablespoon glucose
250g molasses
125g chocolate
Preparation
a. Put all the ingredients in a saucepan and boil.
b. Stirring all the time till it forms a hard ball when tested in cold water.
Ingredients B
1 teaspoon chocolate extract
1/2 teaspoon lemon extract
Action
a. Add extracts into the A mixture and pour into buttered tins on a buttered slab.
b. When cool, cut into pieces with buttered scissors.
Marshmallow Chocolate Fudge
Ingredients
125g marshmallows (break each into 3 pieces)
500g sugar
250g cream
2 tablespoons butter
1 teaspoon vanilla extract
3 teaspoons grated chocolate or cocoa
Action
a. In a saucepan, boil the sugar, cream, and chocolate.
b. When boiling, add the butter, and boil until when tried in the cold water it forms a soft ball.
c. Remove from fire, add the vanilla extract and the marshmallows.
d. Beat until thick, and pour into a buttered pan.
e. Cut into squares when cool.
Yummy...
Honey Bonbons
Ingredients
5 tablespoons strained honey
5 tablespoons cream
1/4 teaspoon salt
1/2 teaspoon rose extract
Chopped marshmallows
Crystallized cherries (cut in halves)
Candied citron (shredded)
Action
a. In a saucepan, combine the honey and the cream. Cook for 8 minutes.
b. After the mixture begins to boil, stirring all the time.
c. Remove from fire, and when slightly cool, add the salt and the rose extract.
d. Sprinkle marshmallows on buttered tins, and pour the mixture over them.
e. Ornament the top with cherries, and candied citron.
Now you have plenty of chocolate candy stocks at home!
Food & Drink Paradise e-zine is a wonderful gateway to meet all food lovers over the world.
Extraordinary recipes and cooking tips will be given to all my subscribers.
I shall show you how to create wonderful recipes for all occasions, including weddings, birthdays, parties, and many more.
Please feel free to explore my work at http://www.allcookmakeeasy.com
Thank you very much, and I love to see you soon again.
Joan Chang
Article Source: http://EzineArticles.com/?expert=Chang_Joan
Are you interested to know how to make chocolate candy?
Keeping some delicious candy stocks at home?
You are now standing in front of a famous chocolate candy shop in town.
Wondering what should you be getting for your coming birthday party?
Madam, are you looking for a new candy? What about trying a
new chocolate candy?
Chocolate Caramels
Ingredients A
750g sugar
250g butter
250 ml milk
1 tablespoon glucose
250g molasses
125g chocolate
Preparation
a. Put all the ingredients in a saucepan and boil.
b. Stirring all the time till it forms a hard ball when tested in cold water.
Ingredients B
1 teaspoon chocolate extract
1/2 teaspoon lemon extract
Action
a. Add extracts into the A mixture and pour into buttered tins on a buttered slab.
b. When cool, cut into pieces with buttered scissors.
Marshmallow Chocolate Fudge
Ingredients
125g marshmallows (break each into 3 pieces)
500g sugar
250g cream
2 tablespoons butter
1 teaspoon vanilla extract
3 teaspoons grated chocolate or cocoa
Action
a. In a saucepan, boil the sugar, cream, and chocolate.
b. When boiling, add the butter, and boil until when tried in the cold water it forms a soft ball.
c. Remove from fire, add the vanilla extract and the marshmallows.
d. Beat until thick, and pour into a buttered pan.
e. Cut into squares when cool.
Yummy...
Honey Bonbons
Ingredients
5 tablespoons strained honey
5 tablespoons cream
1/4 teaspoon salt
1/2 teaspoon rose extract
Chopped marshmallows
Crystallized cherries (cut in halves)
Candied citron (shredded)
Action
a. In a saucepan, combine the honey and the cream. Cook for 8 minutes.
b. After the mixture begins to boil, stirring all the time.
c. Remove from fire, and when slightly cool, add the salt and the rose extract.
d. Sprinkle marshmallows on buttered tins, and pour the mixture over them.
e. Ornament the top with cherries, and candied citron.
Now you have plenty of chocolate candy stocks at home!
Food & Drink Paradise e-zine is a wonderful gateway to meet all food lovers over the world.
Extraordinary recipes and cooking tips will be given to all my subscribers.
I shall show you how to create wonderful recipes for all occasions, including weddings, birthdays, parties, and many more.
Please feel free to explore my work at http://www.allcookmakeeasy.com
Thank you very much, and I love to see you soon again.
Joan Chang
Article Source: http://EzineArticles.com/?expert=Chang_Joan
Subscribe to:
Posts (Atom)
LinkWithin
